Connect & Format a New External Hard Drive to Mac
Learn how to connect and format a new external hard drive to be compatible with the Mac Operating System (MacOS).
If you are using a MacBook Pro or any Mac computer, the hard drive must be formatted with a file system your Mac can support
Instructions
Step 1: Plug the hard drive into the Mac using the cable that came with it
- Most hard drives connect via USB, so you'll just need to plug the USB cable into an open port on your Mac. You'll typically find at least one USB port along each side of the Mac.
- Some Mac-specific drives may come with a Thunderbolt or FireWire cable instead. If this is the case, you'll need to plug it into the correct port or get an adapter if you don't have the proper port on your Mac.
Step 2: Check for your drive on your desktop
If the drive is formatted and connected properly, it will appear on your Mac's desktop as a drive with a USB or Thunderbolt icon.

Step 3: Open the drive to view its contents
Double-click the drive on your desktop or select it from the left frame of a Finder window to view the contents of the drive. You can start dragging and dropping files into the drive or copy files to your Mac's internal hard drive.
Option 2
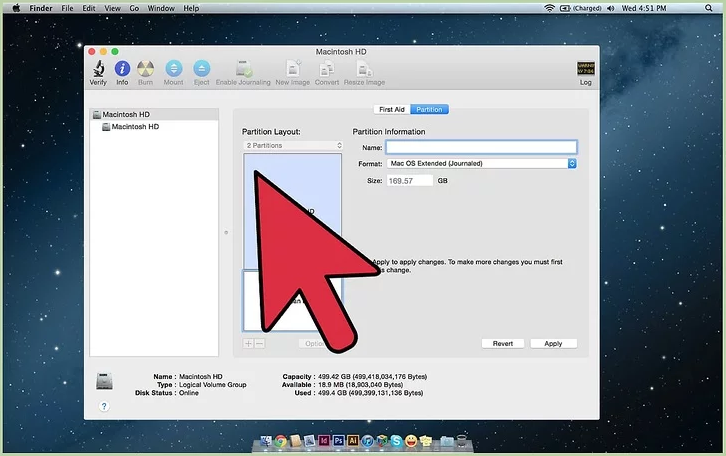
Step 1: Open the Disk Utility
- On the Desktop, click the "Go" menu, select "Utilities," and then “Disk Utility.”
- Formatting the drive will erase everything on it. This is fine for new drives, but if you're trying to use an older drive that already has files on it, you'll need to save them before you start formatting.
Step 2: Select the hard drive from the left menu
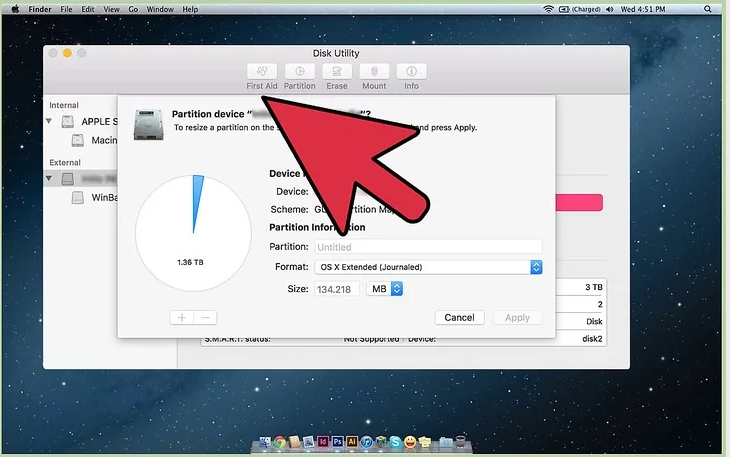
Step 3: Click the "Erase" button at the top of the Disk Utility window
This will start the drive formatting process and erase everything on the hard drive, so make sure any important data has been backed up. If the drive is in Windows format, you can still copy the files you want to save to your Mac before formatting it.
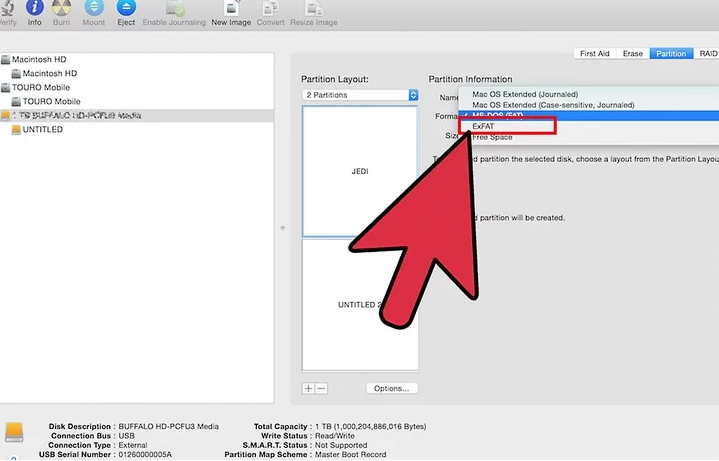
Step 4: Select "ExFAT" from the "Format" menu
- This format is compatible with Mac OS X, Windows, and Linux, allowing you to move your hard drive easily between systems. unlike earlier versions of FAT, there are no practical limits on file size or volume size, which means you can use it on any size drive.
- If you're only planning on using the drive with your Mac, select "Mac OS Extended (Journaled)." This will allow you to take advantage of all of your Mac's features with the drive, such as Time Capsule.
Step 5: Try your newly-formatted drive
Once the drive has been formatted properly, it will appear on your desktop. Double-click it to open it, and you should be able to add a file to it and remove files from it.